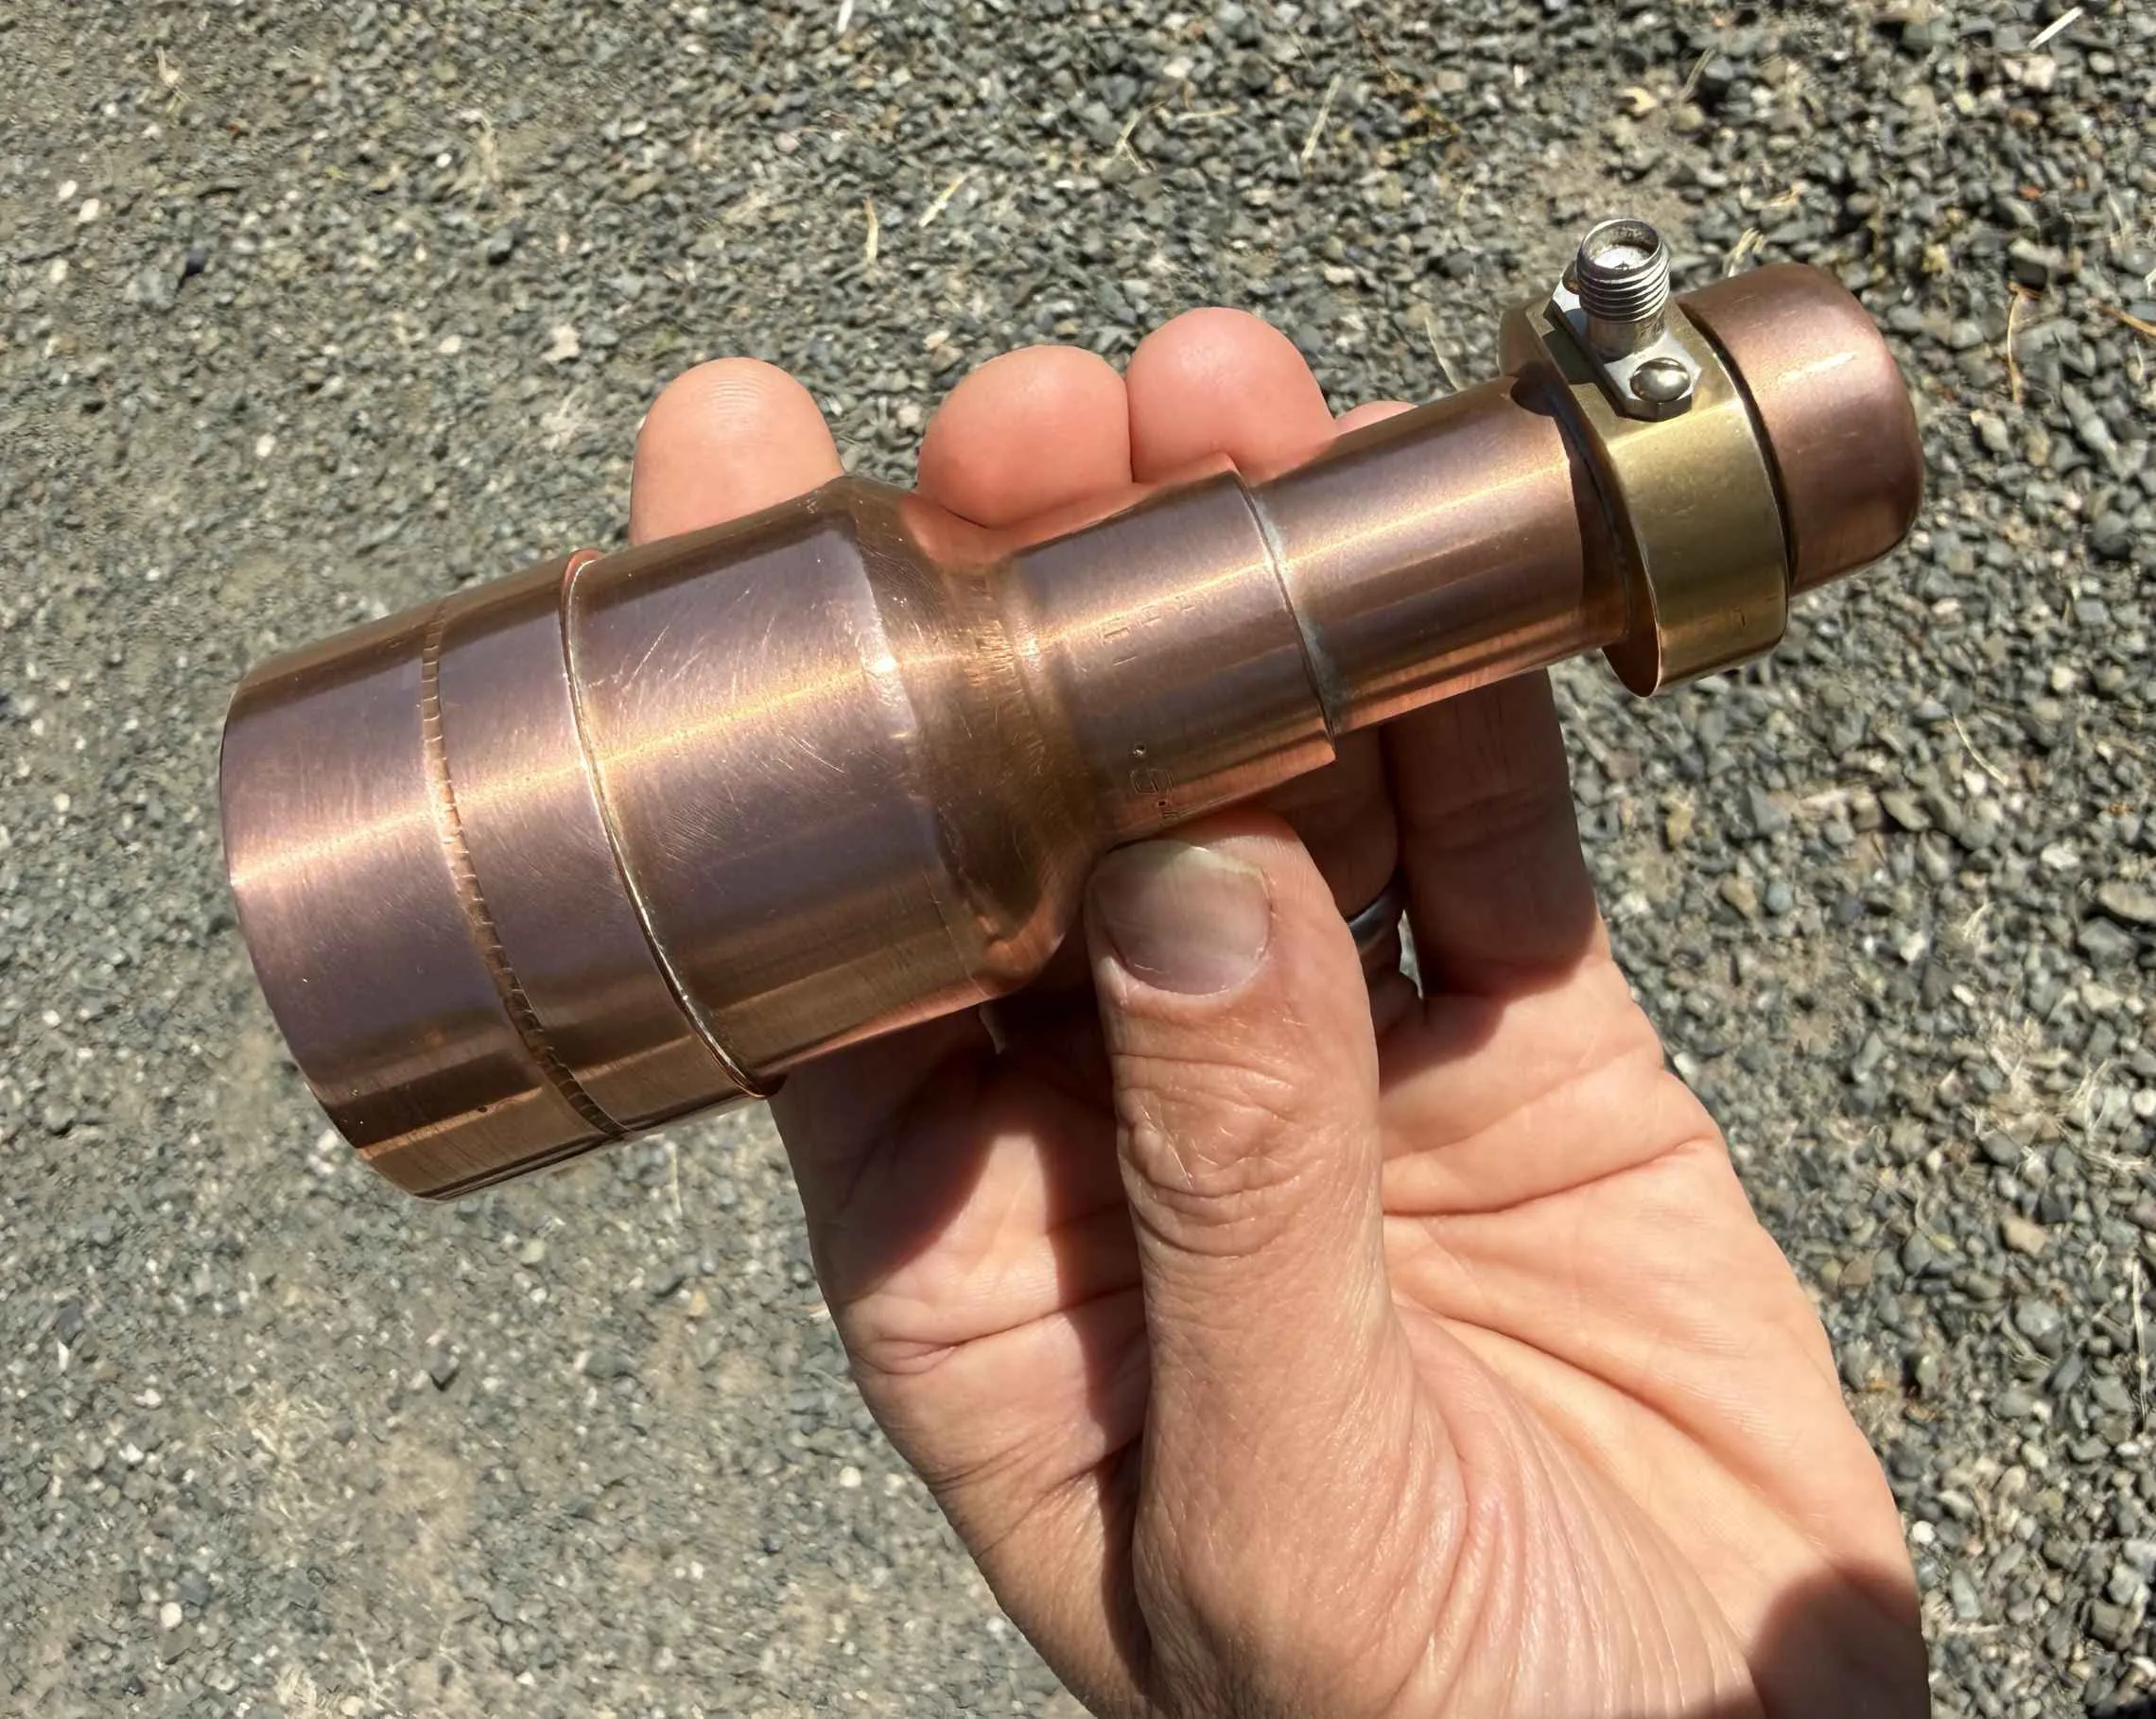
If you've picked up a small satellite-TV offset dish for 10GHz (3cm band) work, then you might want to consider building your own feedhorn. The G3PHO dual-mode feedhorn is a feed you build almost entirely from off-the-shelf copper plumbing fittings, no lathe required.
The design was published by Peter Day, G3PHO, in the mid-1990s, based on the classic W2IMU dual-mode horn (Dick Turrin's original work) and a modification popularised by WA5VJB. Paul Wade, W1GHZ, later ran the geometry through NEC2 simulation and refined one key dimension. The result is a cheap, repeatable feed that's still recommended on UK Microwave Group forums today, decades after it was first described.
Why dual-mode horn?
A plain open waveguide or probe feed tends to illuminate a dish unevenly — the E-plane and H-plane beamwidths differ, the phase centre shifts between planes, and energy spills past the edge of the reflector, picking up ground noise. A dual-mode horn deliberately excites a second waveguide mode in its flared section and dimensions the flare so the two modes largely cancel at the mouth. The payoff is a horn with matched E- and H-plane patterns, a common phase centre, and sidelobes better than -30dB — which translates directly into higher dish efficiency (60%+ is realistic) and a quieter feed.
Which dishes will this suit?
Dual-mode horns of this type are matched to a fairly narrow slice of dish geometry: an f/D — focal length divided by aperture diameter — of around 0.5 to 0.6. The 47mm mouth built here is optimised for the tighter end of that range, around f/D 0.6.
The classic 60cm offset Sky dish is increasingly hard to find secondhand, but it's worth knowing that f/D isn't unique to it — it's a pretty ordinary figure for small offset Ku-band satellite dishes in general. Domestic dishes, whatever the brand (Sky, Freesat, DirecTV, and generic Triax/Winegard-style offset dishes sold for general satellite reception), commonly come out around f/D 0.55–0.65. So a secondhand offset dish of more or less any make, in roughly that range, should illuminate reasonably well — it doesn't have to be the specific dish this feed was originally designed for.
Checking f/D of your dish
There are a couple of different techniques for calculating f/D of an offset dish.
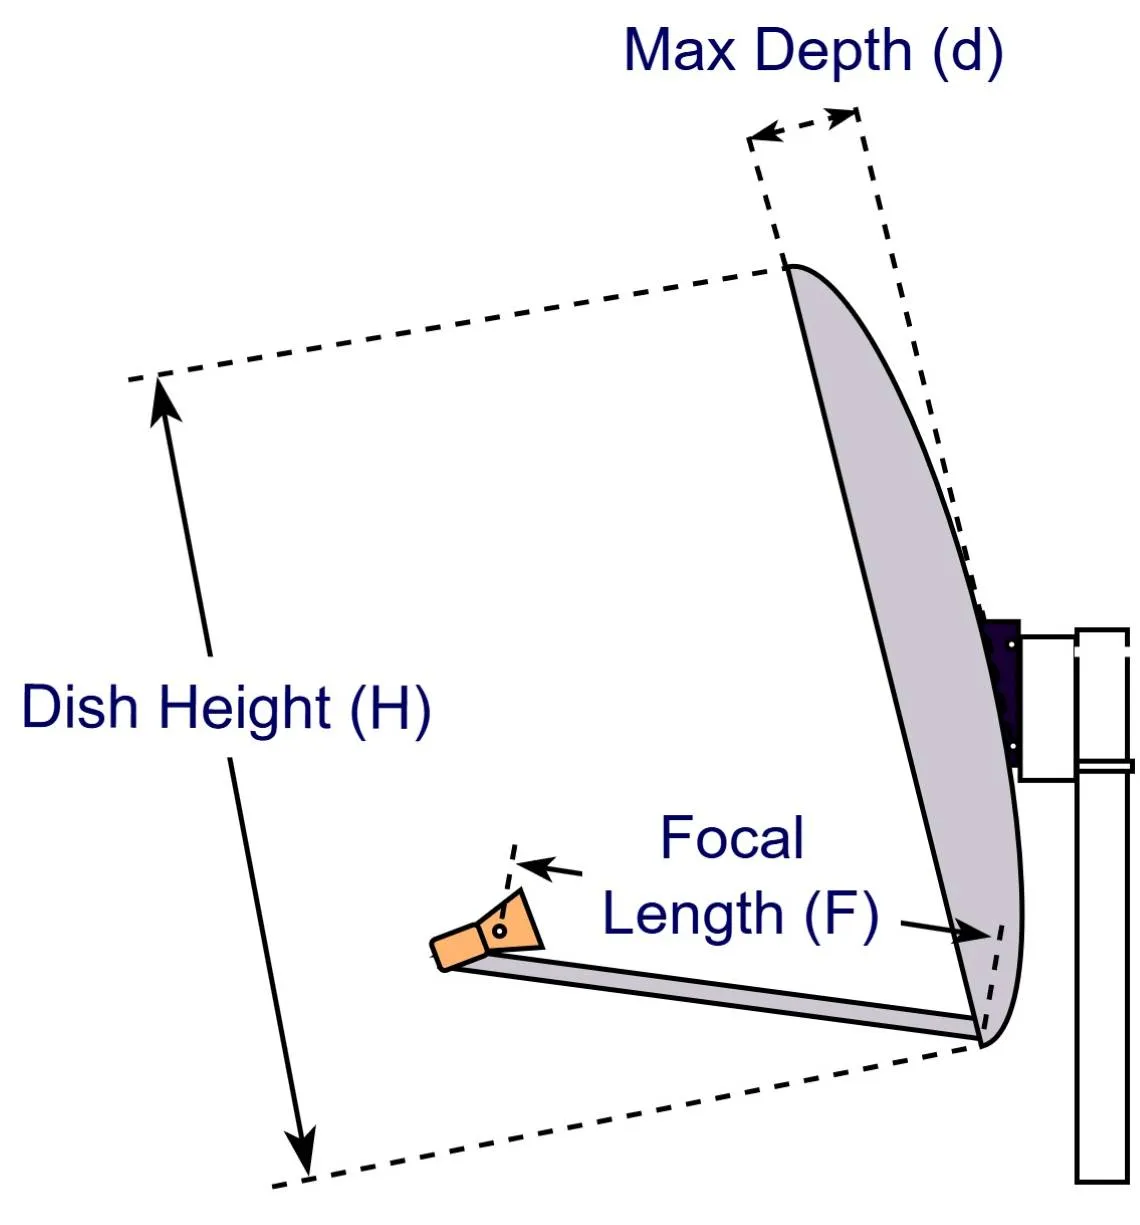
f is the distance from the vertex (the lowest point of the reflector surface) out to the focus (where the TV LNB face normally sits), and D is the aperture — the straight-line height of the reflecting surface of the dish, not the slant height. On a sunny day, you can point the dish at the sun and using a piece of card, move it around until you find a bright focus of light. Measure from this centre to the vertex.
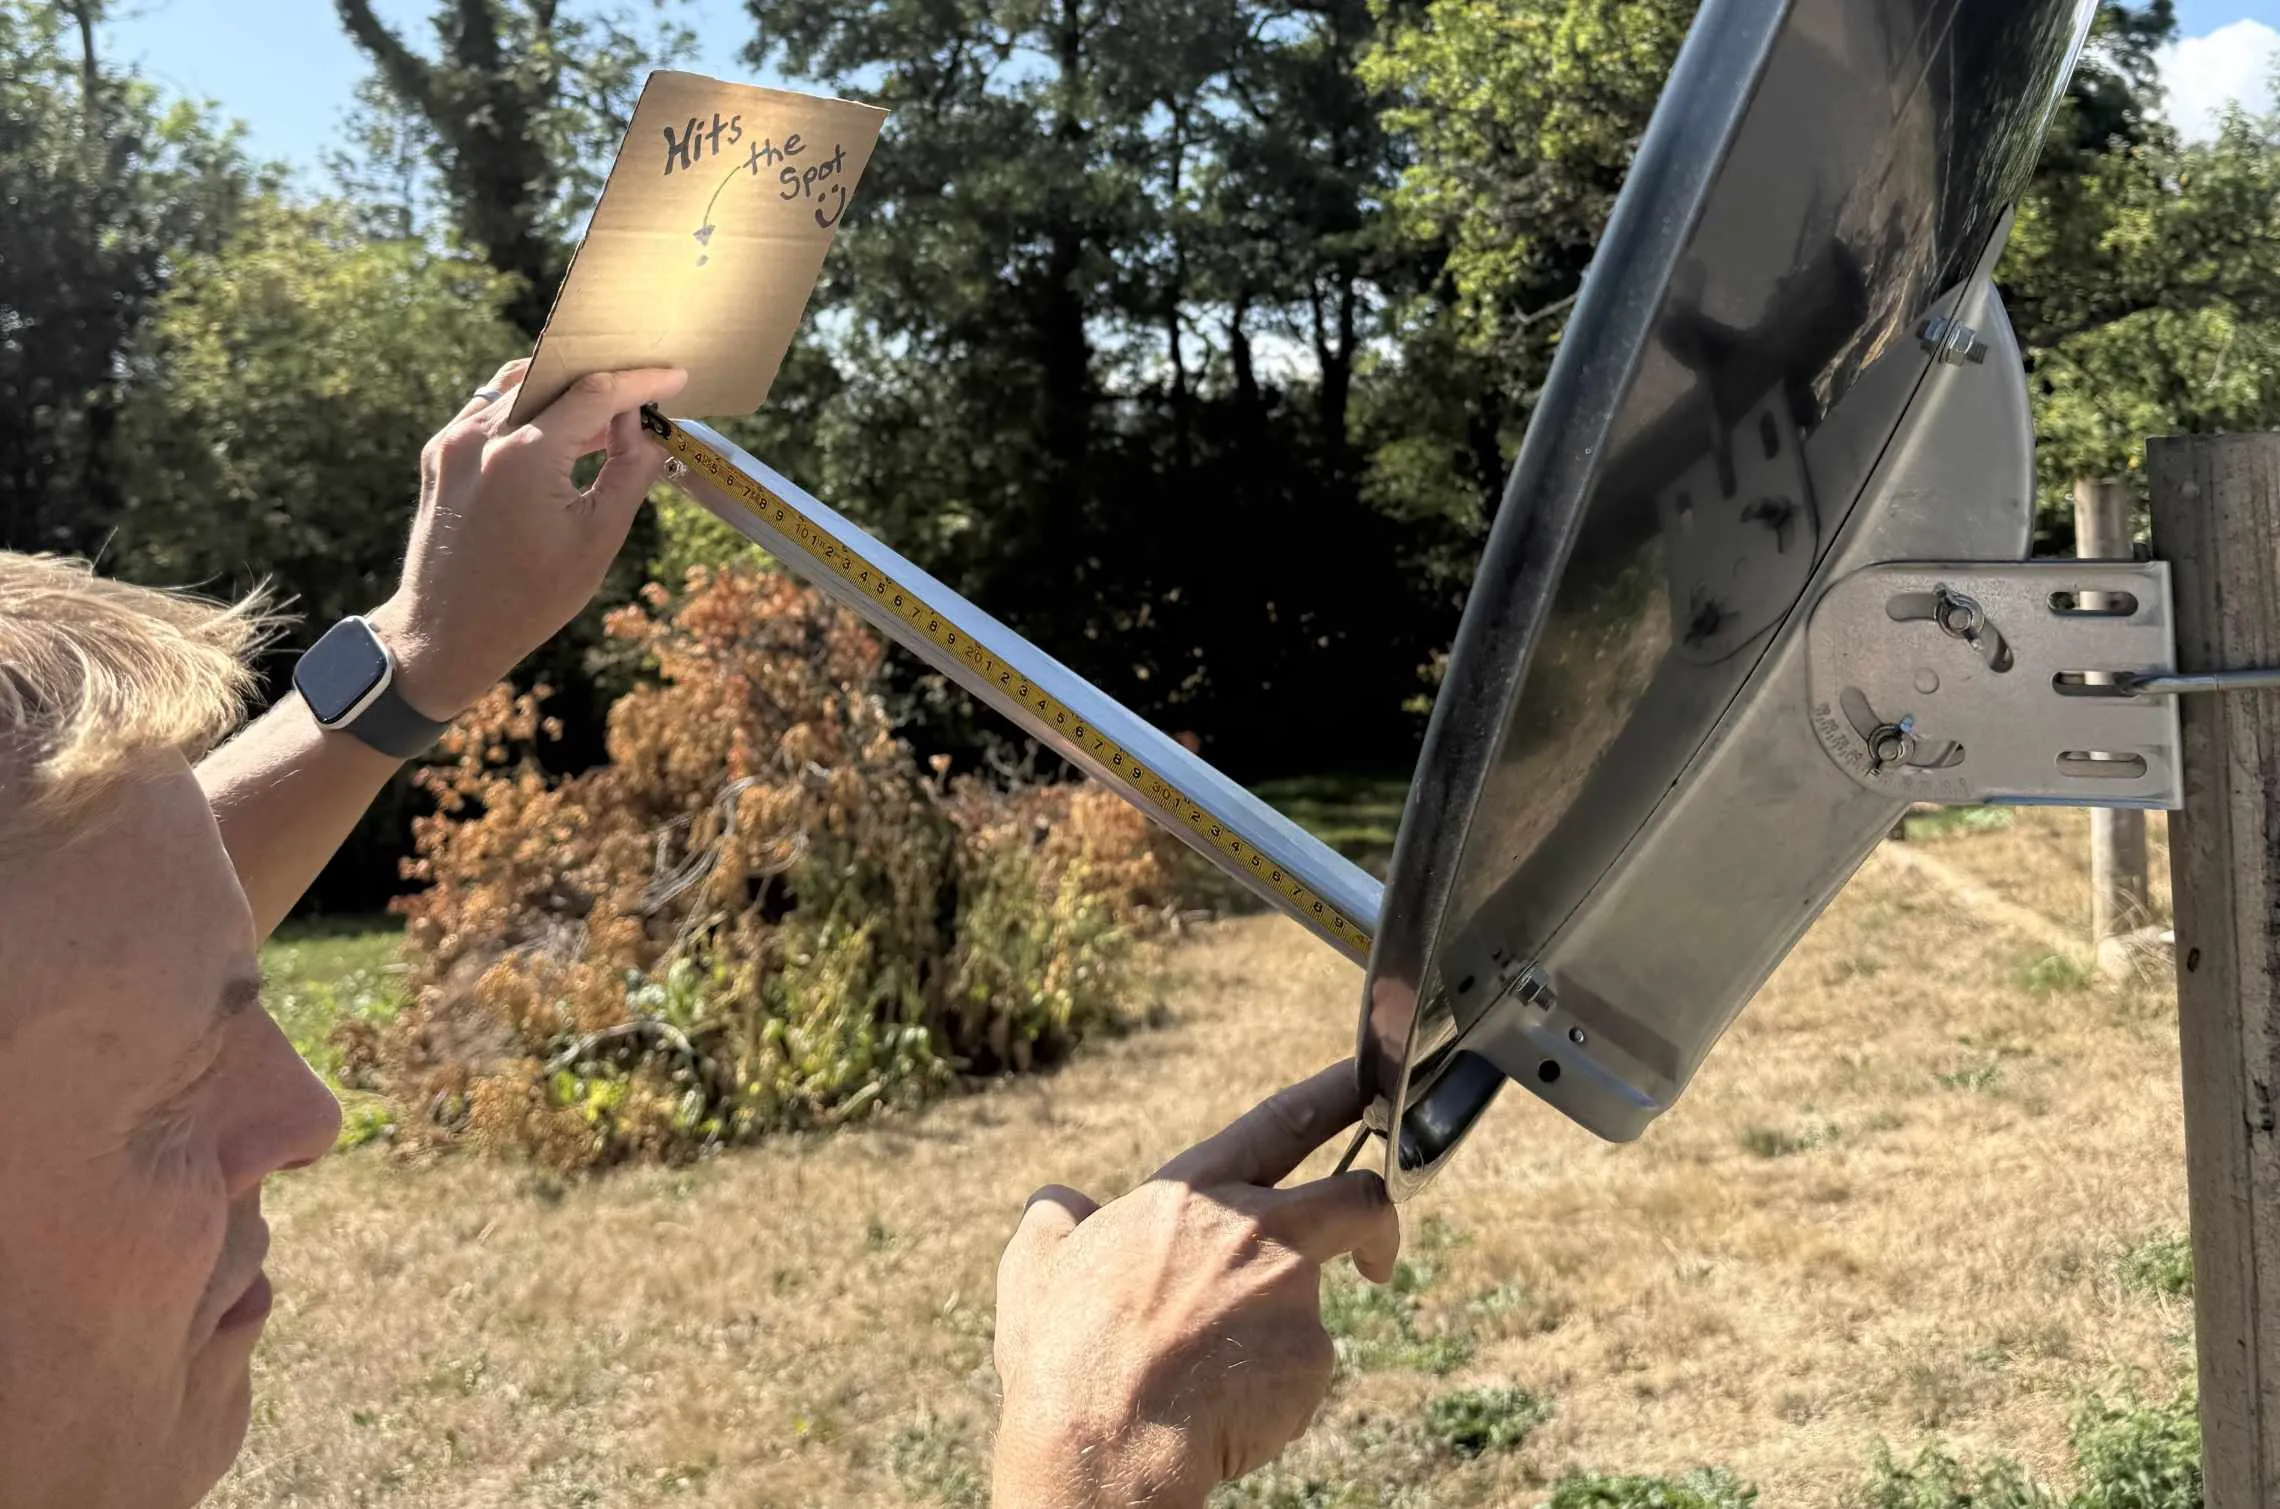
Divide f by D. Bear in mind offset dishes are asymmetric, so this is a practical approximation rather than an exact figure — but it's enough to tell you whether a given dish is in the right ballpark before you commit an evening to building a feed for it.
The second technique is to use the Height, H and the Maximum Depth of the dish. Using a straight edge across the height of the dish, measure from the bottom of this to the deepest part of the dish.
This Parabola Calculator can quickly help you check to see if your dish is the correct f/D:
Check Your Dish f/D

Work out your dish's focal length and f/D ratio from a height and a max-depth measurement (or from a known focal length), and see whether it's a good match for a G3PHO dual-mode horn feed.
Use any unit you like — mm, cm, inches — just use the same unit for every field. Only the ratio matters.
Assumes the dish's near edge sits close to the true parabola vertex — true for most small offset dishes — so treat this as a close estimate rather than an exact figure.
G3PHO Feed - What you'll need
One gotcha worth flagging before you go shopping: UK plumbing fittings are sized by the pipe's outer diameter, and a reducer's stated size describes the two pipe diameters it accepts, not necessarily an internal bore matching those numbers exactly. Take the spec sheet with you, or check the fitting in person, so you don't come home with the wrong reducer.
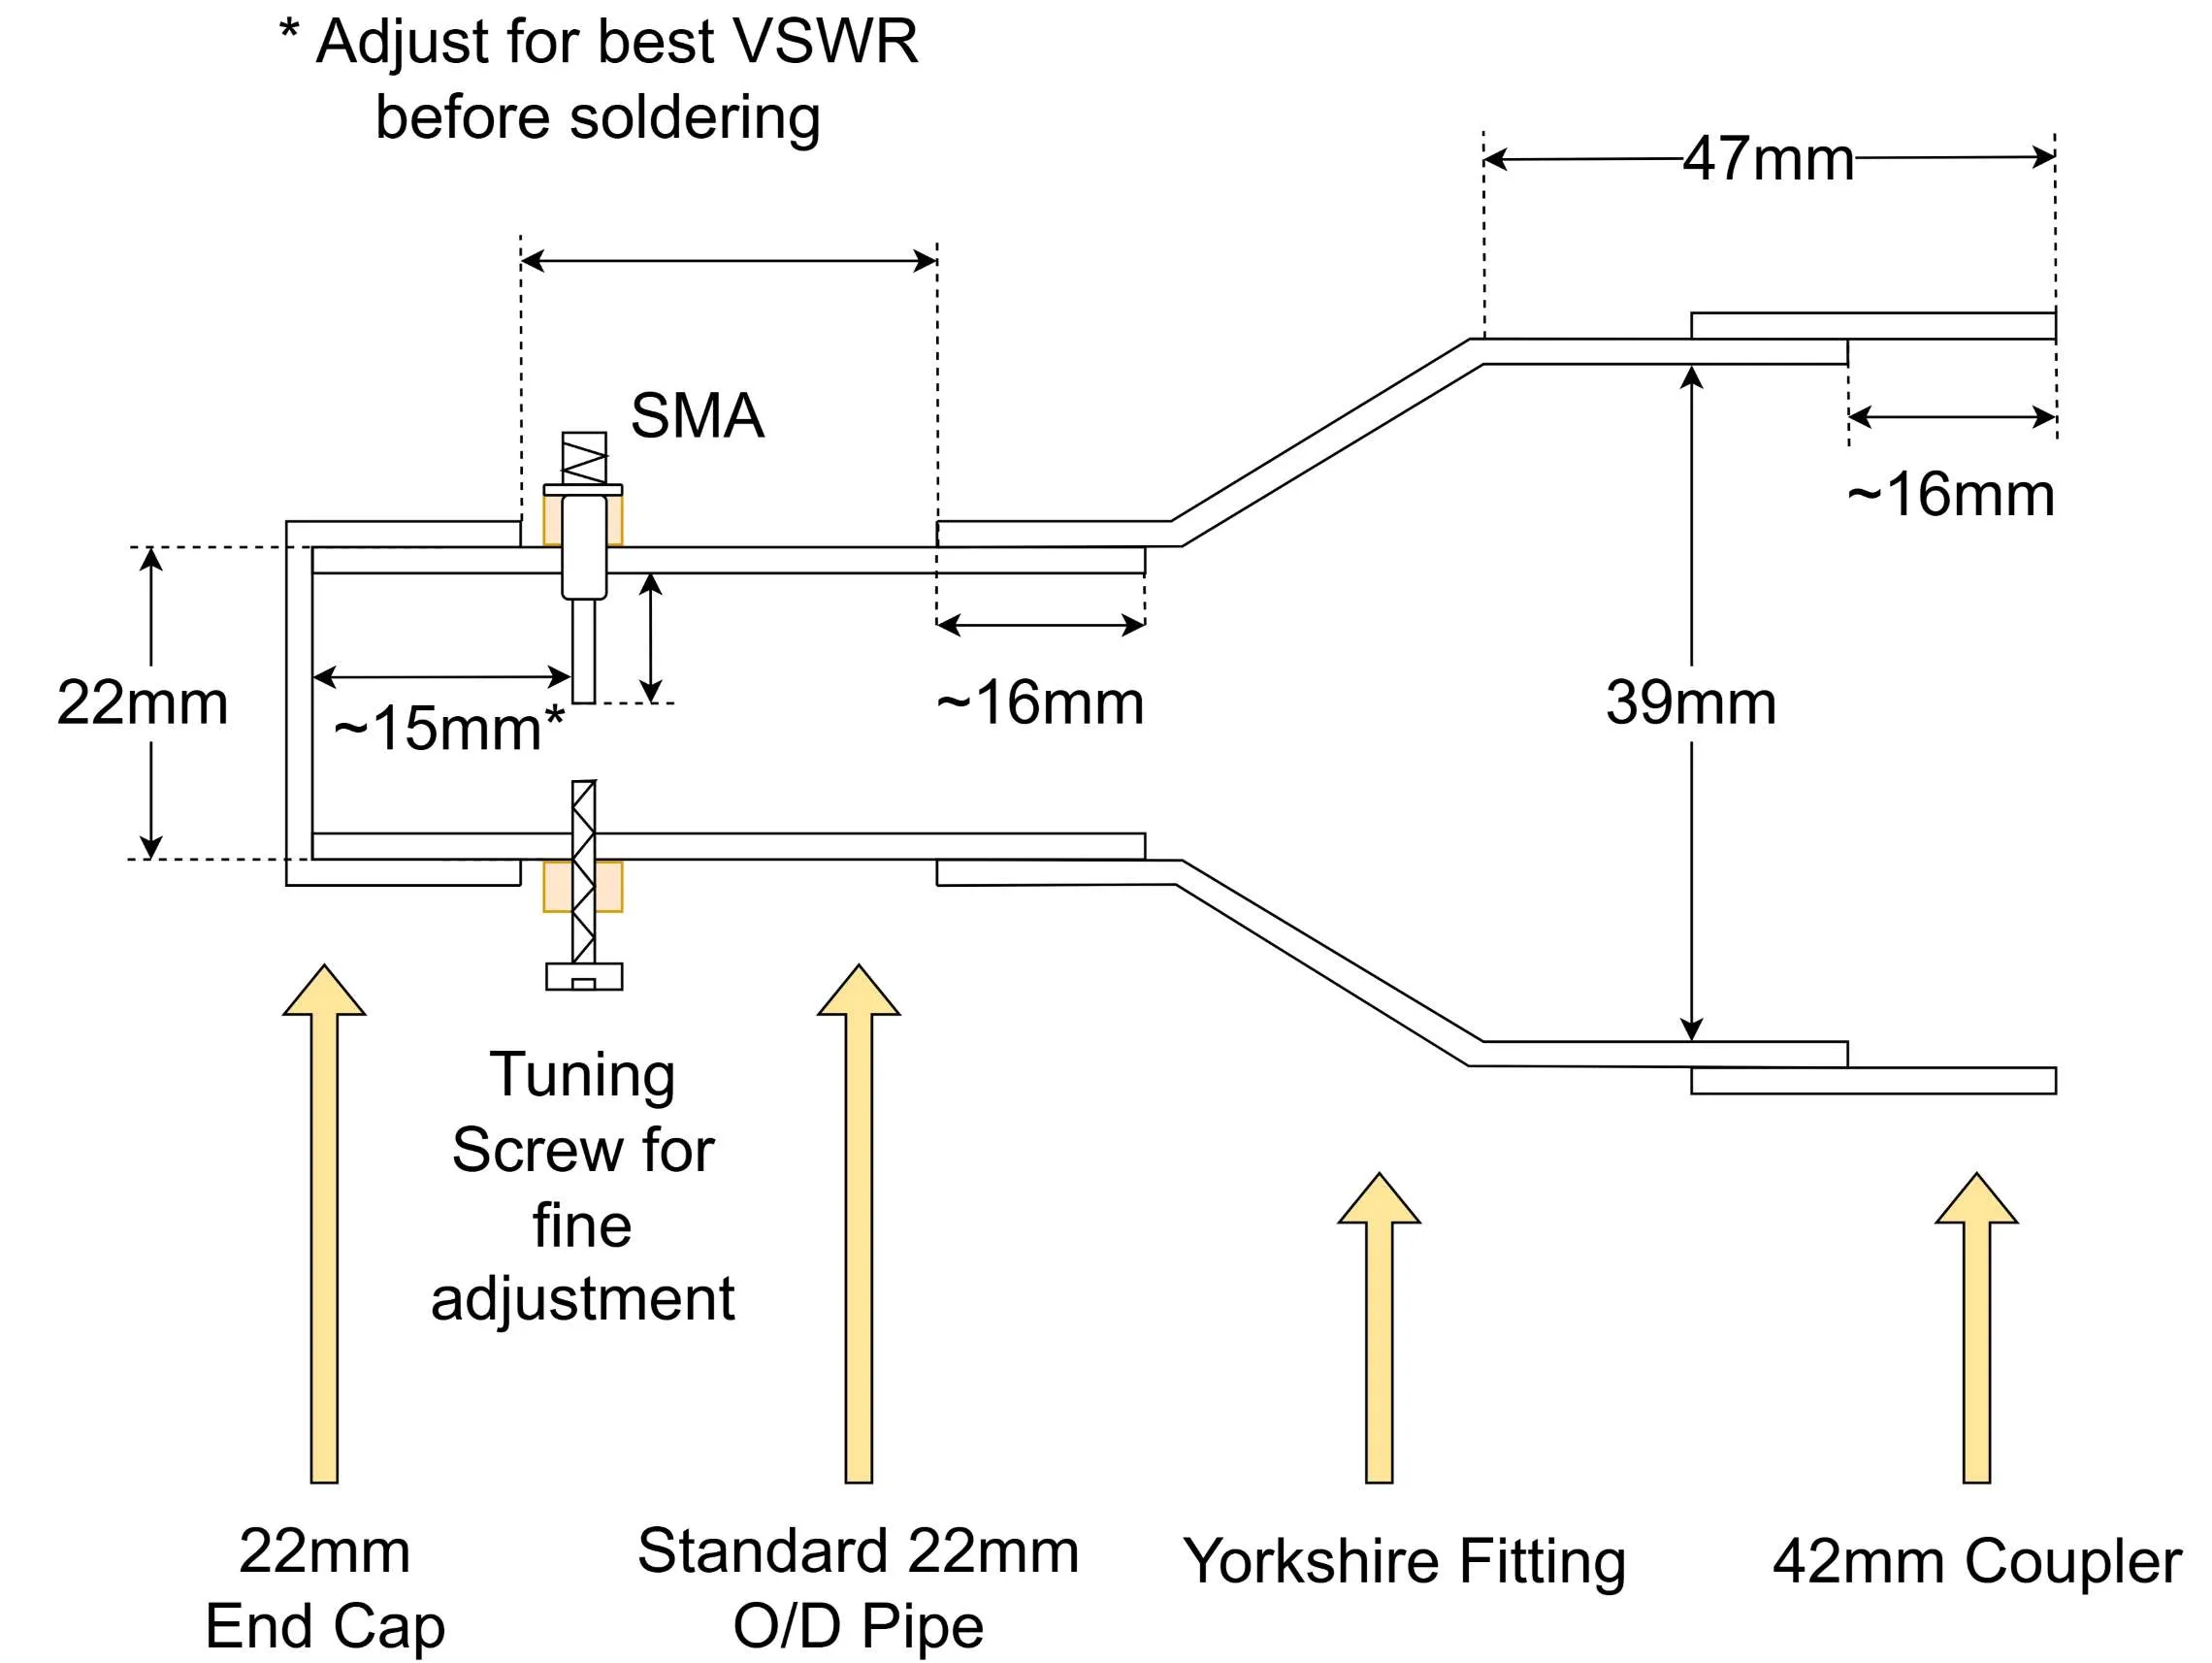
Sketch showing final dimensions
These are the final dimensions of my feedhorn. This would be a good starting point to try before soldering.
Building the horn
1. Dry-assemble the flare and mouth
Push the 42mm end of the reducer into the 42mm straight coupler. This gives you the flared throat feeding into a wider cylindrical mouth — don't fix it permanently yet.
2. Cut the mouth to length
This is the one dimension worth getting right. G3PHO's original article used a 64mm length for the outer section, taken from the original W2IMU figures. W1GHZ later ran the geometry through NEC2 simulation and found that a shorter length — about 47mm, measured from the end of the flare to the open aperture — gives a noticeably cleaner, more symmetrical pattern, and is a good match for dishes around f/D 0.6. This is the version built here: trim the excess off the 42mm coupler down to 47mm and true up the cut face carefully; the aperture needs to be flat and square, or the pattern skews off-axis.
3. Fit the SMA probe
Rather than the traditional 22mm-pipe-to-waveguide route, this build feeds the horn directly with coax which is more widely used than waveguide these days. Drill and fit a panel-mount SMA connector through the wall of the narrow (throat) end of the reducer, with the probe protruding into the throat. A friend machined a brass collar to provide extra strength for mine.
4. Prepare the tuning joint
Tuning for best match
With the horn connected through a directional coupler and to your 10 GHz transverter, you can use a detector to measure minimum voltage on the reflected power port of the coupler. Matching is set by how far the SMA probe protrudes into the throat and where it sits relative to the backstop (pipe cap). Trim the probe length and, if needed, adjust the backstop very slightly while watching return loss, rather than sliding the pipe as in the original waveguide-fed design. A tuning screw can be added opposite the SMA probe for final/fine tuning.
[Probe length, insertion depth, and any backshort used on this build to go here.] It's worth doing a final check once the horn is mounted on the dish and pointed at a known signal — a local 10GHz beacon, or a low-power source at distance and at the same height as the dish, works well. Only once you're satisfied should you make the joint permanent, and even then, solder on the outside of the fitting only — never inside the horn.
Mounting and feeding
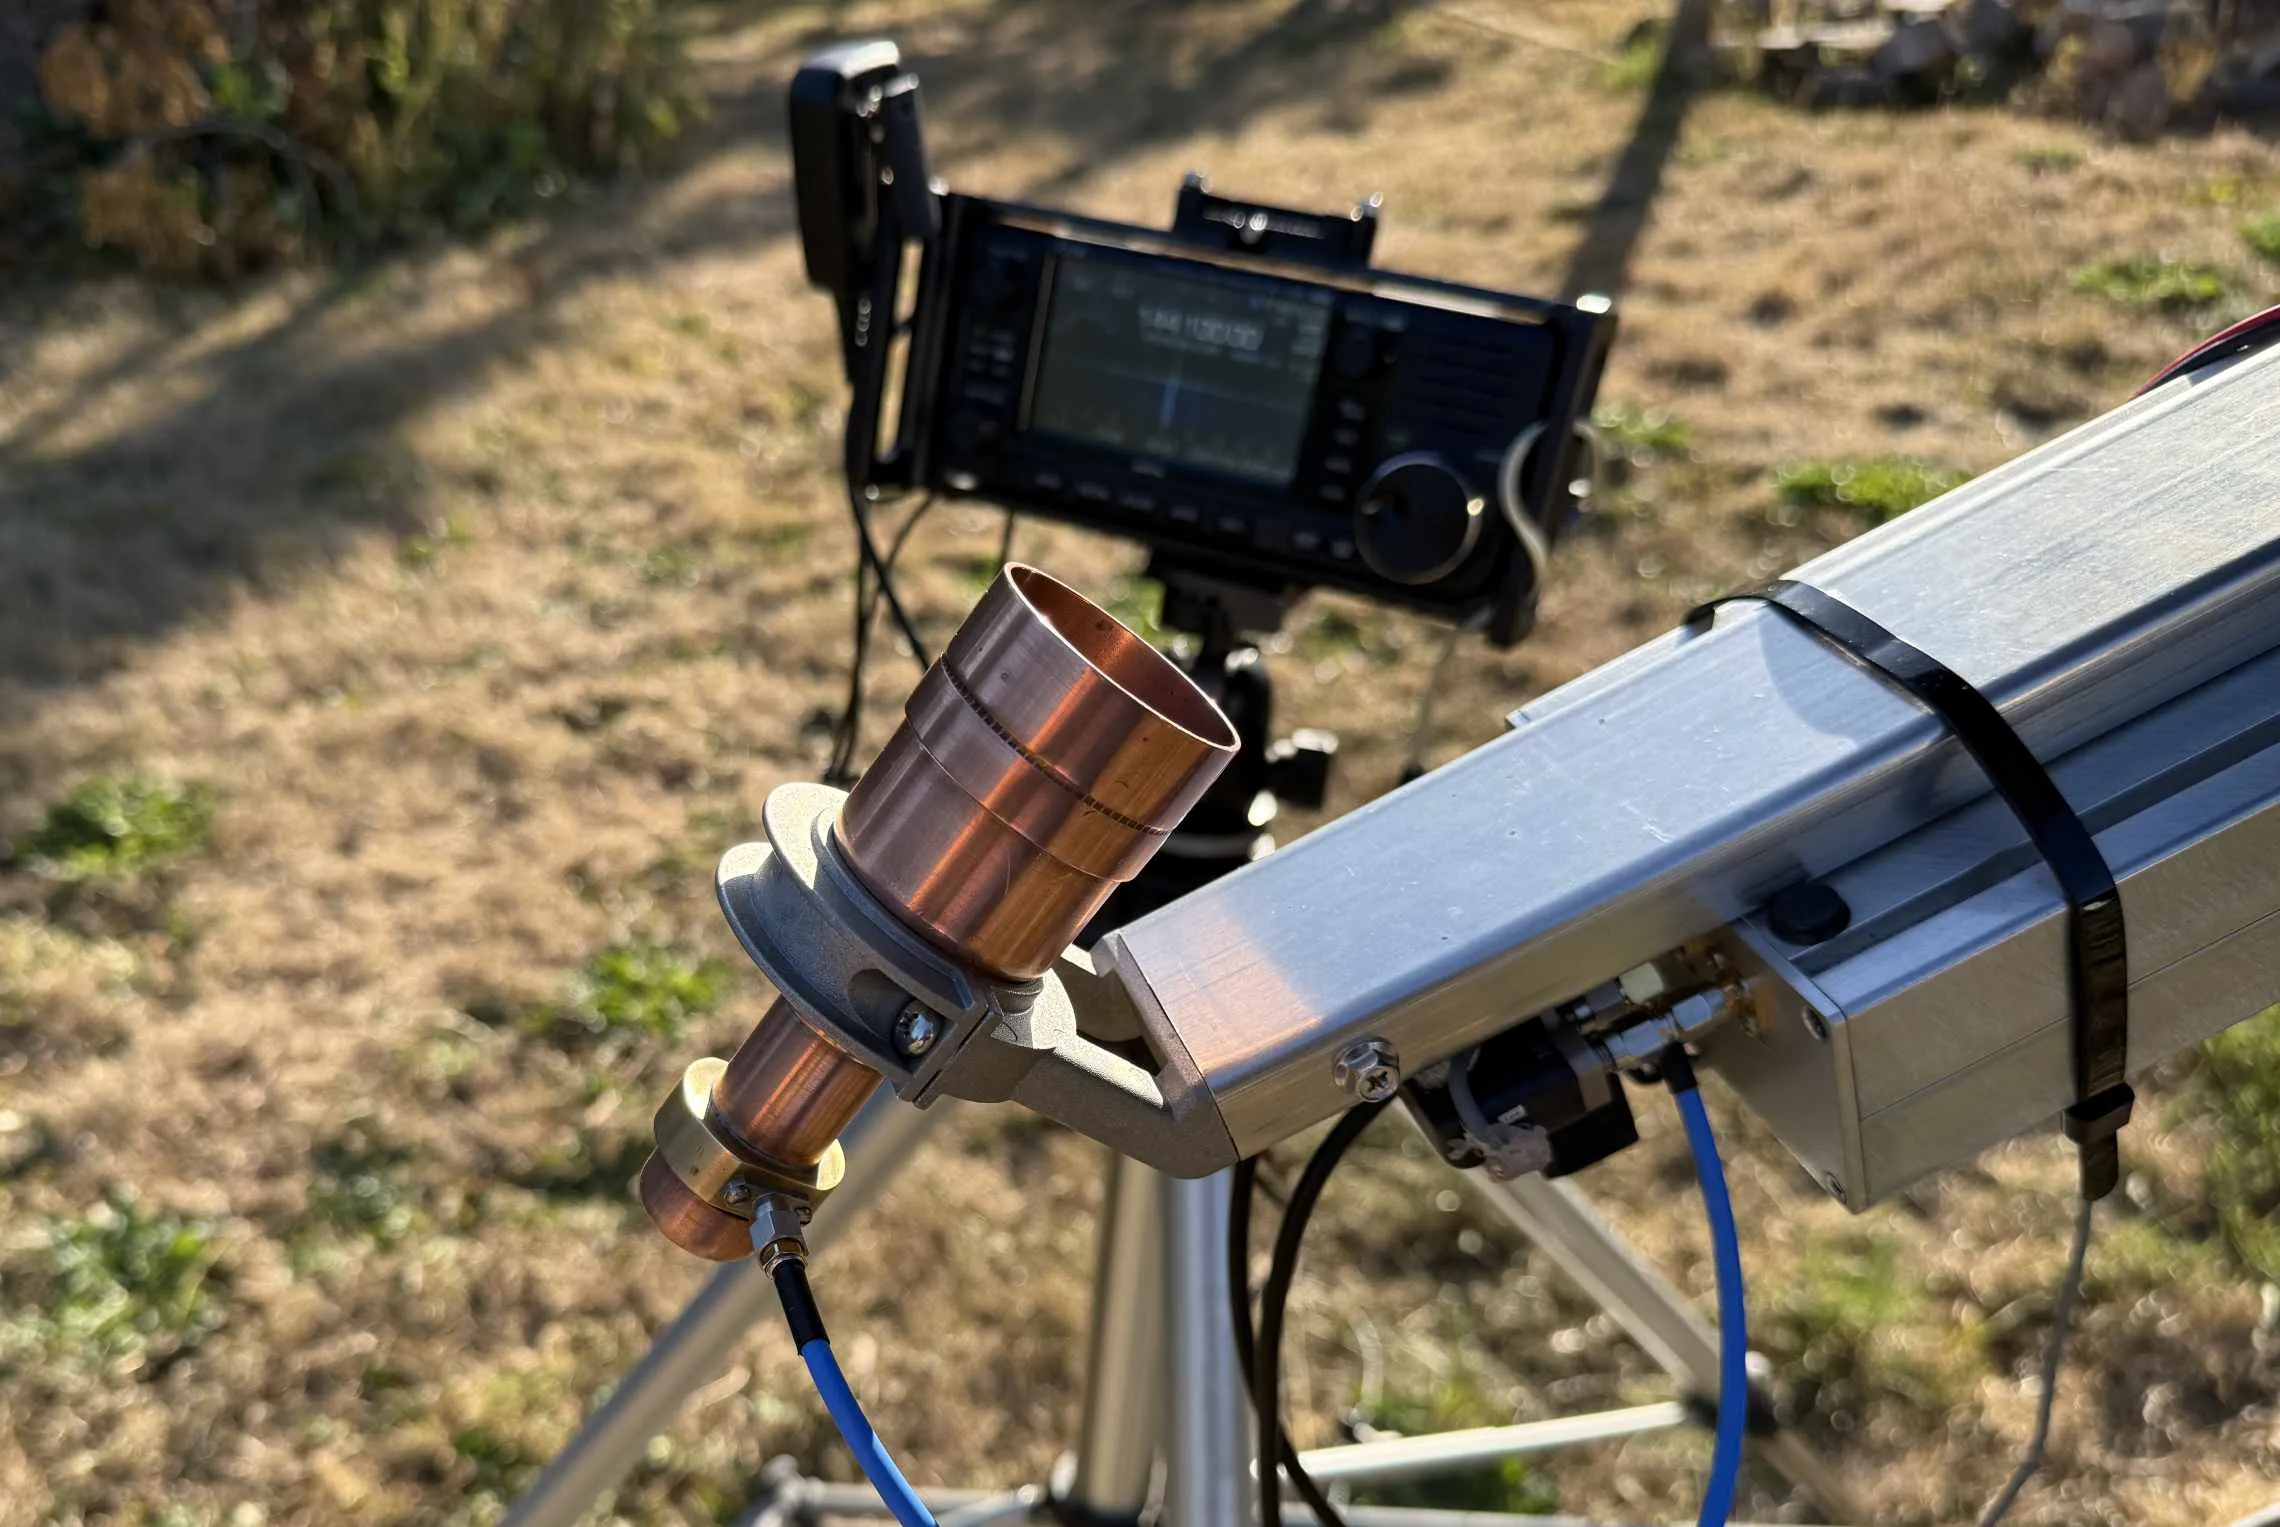
The horn generally bolts straight onto the same feed-arm clamp the dish's original LNB would be used; a plastic clamp may need light filing to accept the slightly different horn diameter. This build feeds the horn directly with coax via the SMA probe, which sidesteps the waveguide transition entirely and connects straight to the (feed arm mounted) transverter with a short length of coax. The traditional alternative, if you'd rather go this route, is to shape the end of a 100mm length of 22mm pipe onto a WG16 waveguide flange using a forming tool, then run a short length of flexiguide to the transverter box before transitioning to coax.
What to expect
Built and tuned carefully, this horn should give you a low VSWR, and sidelobes should be better than -30dB and therefore a horn that's quiet on ground noise. I tested it against the I0JXX machined horn feedhorn and the difference in signal strength from my mini beacon was barely noticeable. or an evening with plumbing fittings and a hacksaw, and a relatively low cost- it's hard to beat.
Variations and further reading
Some builders have extended the idea to dual-band 5.7/10GHz operation by adding a second coax probe. If you want to model or rescale the geometry yourself, Paul Wade W1GHZ's Microwave Antenna Book and more recent work by Charlie Suckling, DL3WDG, both cover dual-mode horn theory and modern simulation tools in more depth.
The simulation results performed by Paul W1GHZ for the 47mm long G3PHO dual-mode feedhorn can be found here: www.g3pho.free-online.co.uk/microwaves/horn.pdf
Credit
Credit: This design was originally published by Peter Day, G3PHO, with the mouth-length refinement contributed by Paul Wade, W1GHZ, following NEC2 simulation. The original article is found at www.g3pho.free-online.co.uk/microwaves/horn.htm.